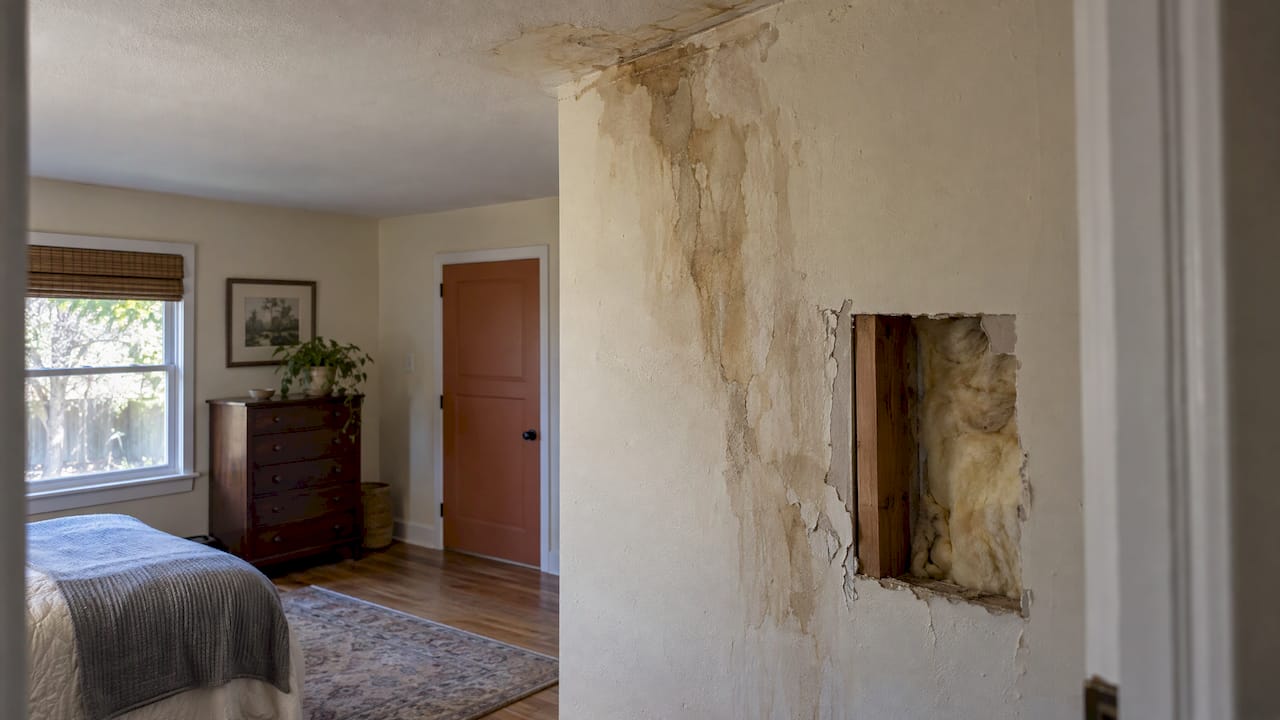


Water damaged drywall can be saved only when the leak is stopped, the water was clean, the board is not swollen, its seams are intact, and it dries fast. If any of those fail, the wet section has to be cut out and replaced. Once the wall is dry and sound, the repair is patching, taping, sanding, priming and painting. That last stretch decides whether the wall looks fixed or looks like a patched leak. At Alan’s House Painting in Davis, drywall repair is part of what we do, and we take the job from the prepared wall through the final coat.
TL;DR
- Stop the water first, then decide: drywall with no swelling and intact seams may dry in place; swollen, soft or sagging board should come out.
- Dry fast. EPA says mold will not grow in most cases if wet items are dried within 24 to 48 hours.
- Dirty or sewage-related water, deep water or active flooding calls for qualified professionals, not a weekend repair.
- A repair that is only patched will often show through paint. Stain-blocking primer, feathered compound and a matching finish make it disappear.
- If you want the whole job finished and painted once the wall is dry, we offer drywall repair and interior painting in Davis and the Sacramento area.
Table of Contents
- What water damaged drywall looks like
- Step 1: Stop the water and find where it came from
- Step 2: Check the water type before you open anything
- Step 3: Decide whether to dry in place or cut it out
- Step 4: Dry the wall, and the cavity behind it
- Step 5: Remove what has to go
- Step 6: Install the patch
- Step 7: Sand, prime and seal the stain
- Step 8: Paint so the repair disappears
- Mold, mildew and the wall that keeps coming back
- A worked example: a ceiling stain under a bathroom
- When to hand it to a professional
- Having us finish the repair
- FAQ
- Sources
What water damaged drywall looks like
Drywall is gypsum plaster pressed between two layers of paper. Paper and gypsum both soften when they stay wet, which is why the signs are easy to read once you know them:
- Stains: yellow, brown or copper-colored rings or patches, often with a darker edge where the water stopped spreading.
- Paint changes: bubbling, peeling or cracking paint, or a patch that looks darker or duller than the wall around it.
- Texture changes: a soft spot when you press gently, a bulge, a sag on a ceiling, or seams that have popped open.
- Smell and growth: a musty odor, or black, green or white spots, which point to mold.
A stain alone does not mean the board is ruined. A dry, old ring from a leak that was fixed long ago is a cosmetic problem. A stain that is damp, growing, or paired with softness is a structural and moisture problem. Bubbling paint in a bathroom has its own causes, which we cover in our guide to why interior paint bubbles in bathrooms.
The same question comes up with spackle. Spackle or joint compound applied over a wet wall does not dry the wall. It traps moisture behind a skin of filler, and the patch will crack, bubble or stain again. Fill only after the board underneath is dry.
Step 1: Stop the water and find where it came from
No repair lasts while the source is still active. Common sources are a leaking supply line, a failed drain, a roof or window leak, a condensation problem, or an appliance overflow. Shut off the water to the fixture, or have the roof leak tarped, before you touch the wall.
Then look at how far the damage goes. The National Institutes of Health facilities office suggests removing the base molding to inspect the wallboard, because water often wicks behind the trim where you cannot see it. Its guidance also recommends comparing a moisture-meter reading on the affected drywall with a reading from an unaffected section of drywall. The two should match when the wall is dry.
A stain on a ceiling is usually smaller than the wet area above it. Water runs along framing and pools in insulation, so check beyond the visible ring.
Where it goes wrong: people repair the stain they can see and paint over it while the cavity is still wet. The stain returns in a few weeks, and the paint on it fails.
Step 2: Check the water type before you open anything
Water that came from a clean supply line is a different problem from water that came from a sewer backup, a flood or a long-standing leak. EPA guidance says contaminated water calls for appropriate personal protective equipment and containment, and cautions against using fans before you know the water is clean. It also says people without expertise should consult an experienced professional for cleanup involving contaminated water or sewage.
State Farm’s flood guidance lists the situations that call for qualified help: contaminated, deep or moving water, water still entering the home, structural damage, or anything unsafe to remove yourself. In those cases, call a licensed water-restoration professional first, and call your insurer. Electricity near wet walls is a separate danger: if outlets or wiring are in the wet area, have the power shut off and a licensed electrician check it before anyone cuts into the wall.
For a small, clean-water leak, the steps below apply.
Step 3: Decide whether to dry in place or cut it out
This is the decision that matters most. Several authorities give the same rule in different words.
| Condition of the drywall | What to do | Source |
|---|---|---|
| No obvious swelling, seams intact | May be dried in place, with the wall cavity ventilated | EPA |
| Swollen, soft, or seams failing | Remove and replace | EPA |
| Water-soaked wallboard | Typically needs removal because it loses structural integrity | NDSU Extension |
| Flood-soaked board and insulation | Discard | U.S. Department of Energy |
Fine Homebuilding gives a four-part test for keeping drywall: the source is eliminated, the water was uncontaminated, the board can dry thoroughly before mold grows, and it is still structurally sound. Miss any one and the board should be replaced.
If the board will not dry within 48 hours, the NIH guidance says to cut it out to 12 inches above the water mark or damage, and to discard damp insulation.
Where it goes wrong: homeowners judge by the surface. A wall can look flat and still hold wet insulation behind it. NDSU Extension notes that insulation can hold water against the interior paper facing, and that wet materials may mold within one to three days depending on temperature. Surface appearance is not the whole drying problem.
Step 4: Dry the wall, and the cavity behind it
Drying is where most failed repairs begin. Will a dehumidifier pull moisture out of drywall? It helps, as part of a system. NDSU Extension recommends cross-ventilation, or a dehumidifier with fans to circulate air across damp surfaces. The air moves moisture off the surface, but the cavity behind the board is the hard part: EPA says that when drywall is left in place to dry, the wall cavity is the most difficult area to dry and should be ventilated.
In practice:
- Remove damp insulation. NIH says it should be discarded and the cavity ventilated. Fine Homebuilding adds that removing wet insulation when it is accessible helps the drywall dry faster.
- Take off base trim so air reaches the bottom edge of the board.
- Run fans and a dehumidifier, but only once you know the water was clean.
- Measure. Use a moisture meter and compare to a dry control reading from the same wall material.
The 24 to 48 hour window from EPA is the reason to move quickly. If you are away, if the wall is in an unheated room in winter, or if you cannot get the readings to match, bring in help rather than closing the wall up.
Step 5: Remove what has to go
For a small damaged area on an otherwise sound wall:
- Mark a clean rectangle around the soft or stained board, extending to the middle of the nearest studs on each side if you can, so the new piece has framing to attach to.
- Score with a utility knife and cut with a drywall saw or oscillating tool. Check for wires and pipes first, and cut shallow.
- Pull the damaged board, then remove any wet insulation.
- Look at the framing and back of the board for mold. Visible mold is a reason to stop and consider professional remediation, especially if it covers a large area.
If the drywall has simply detached but is otherwise sound, Fine Homebuilding advises letting it dry completely before refastening it, with temporary support to prevent sagging, and removing any loose tape and joint compound.
Step 6: Install the patch
The Department of Energy’s homeowner repair guide says large replacement pieces should be fastened to the studs, and unsupported edges should be backed with framing blocks. It also calls for leaving about a 1/8-inch gap around the replacement piece, then using quick-setting compound with fiberglass tape.
- Cut the new piece to fit, with the gap noted above.
- Screw it to studs or blocking, with screw heads just below the surface and the paper unbroken.
- Tape the seams. Fiberglass mesh tape and setting-type compound are what the DOE guide specifies for large repairs.
- Apply a first coat of compound, let it set, and add thin, wider coats.
Where it goes wrong: a patch that is perfectly flat but only a few inches wider than the hole. Compound needs to be feathered out well beyond the edge, often a foot or more on each side, or the repair will show as a raised ghost in side light. This is the point where many homeowners accept a visible patch because the work is fiddly. It is also where drywall finishers earn their keep, and where a painter who does the repair and the painting as one job has an advantage: the same person sees how the wall will read under paint.
Step 7: Sand, prime and seal the stain
Sand the dried compound smooth, wipe off the dust and inspect the wall with a light held at a low angle. Any ridge you can see now will show after painting.
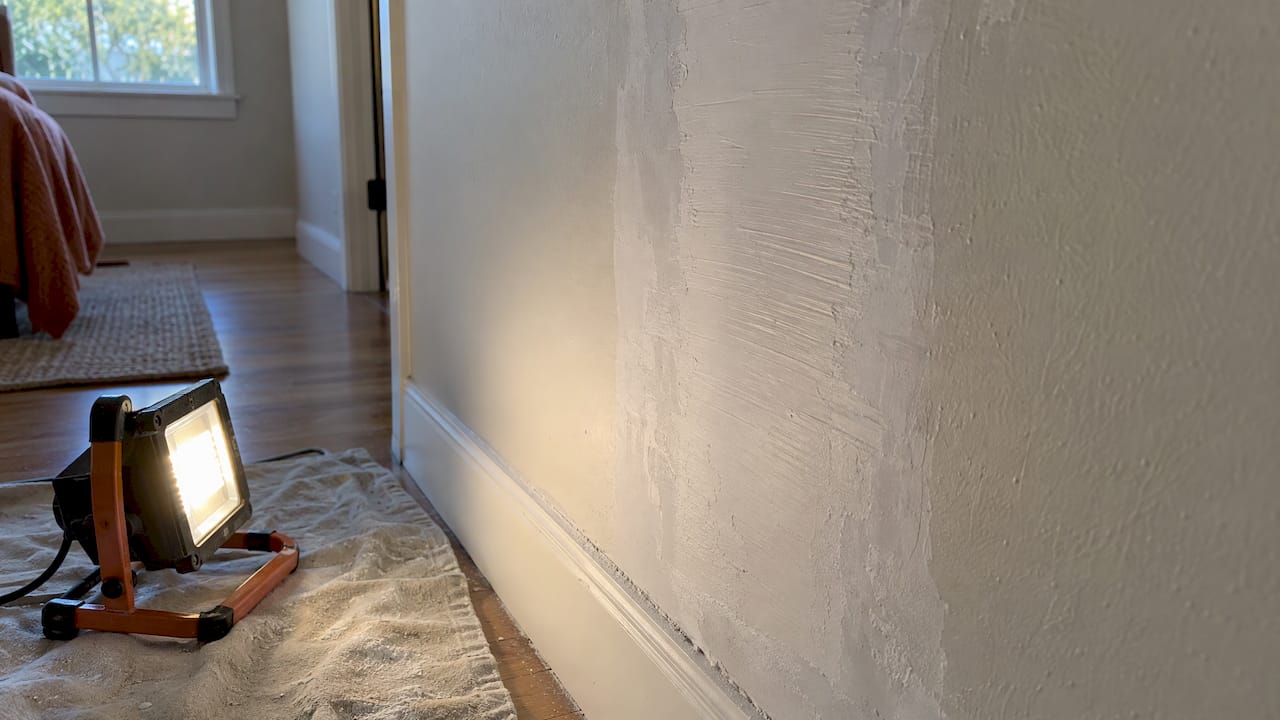
Next is primer, and it is not optional. Small, dry water stains can be sealed with a stain-blocking primer and repainted, according to Fine Homebuilding; larger damage should be removed, cleaned, dried and repaired. Water stains bleed through ordinary wall paint, so use a stain-blocking primer. Extend the primer past the visible edge of the stain, and prime the new patch too, because bare compound and new paper absorb paint differently than the wall around them, which causes dull “flashing” patches.
If the paint is bleeding through or yellowing after you prime, our article on fixing paint bleeding on interior walls explains why it happens.
Step 8: Paint so the repair disappears
This is the step that tells everyone whether you did a good job. A patched and primed section needs a finish coat matched to the sheen, color and texture of the wall.
- Sheen: a flat patch on a satin wall shows. Paint should go on in the same product and sheen as the rest of the wall.
- Color: paint ages. Old paint has faded and collected dust, so a fresh coat of the original color often looks slightly different. Painting the whole wall, corner to corner, avoids a visible square.
- Texture: knockdown, orange-peel and skip-trowel finishes have to be reproduced on the patch. A smooth patch on a textured wall is obvious.
- Ceilings: roll the full ceiling in one session, working wet edge to wet edge, so there are no lap marks.
Matching is the real craft here. We specify the paint products on our projects, offer color consulting, and focus on careful preparation and detail in the work. If you would rather not match a texture and sheen yourself, we can handle the repair and the paint together, and our interior painting service covers the whole room.
Mold, mildew and the wall that keeps coming back
A wall that stays damp is a place mold will grow. Mold is a health matter as well as a cosmetic one, and the first response is to dry and ventilate quickly. Cutting out and discarding affected board and insulation is the standard answer in the guidance cited above. People with asthma, allergies or weakened immune systems should talk to their doctor before doing any cleanup around visible mold.
Mildew on painted surfaces that is not tied to a leak is a separate situation, usually about humidity and ventilation. See our guide to preventing mildew on painted interiors.
If the damage started outside, such as storm damage to siding or fascia, treating the exterior is part of the fix. Our posts on water damage to exterior paint and repairing wind and rain damage cover that side.
A worked example: a ceiling stain under a bathroom
Suppose a slow drain leak leaves a 14-inch brown ring on a hallway ceiling, and the plumber has fixed the pipe. You press the ceiling and it feels soft, and the paint is bubbling.
- The source is fixed, the water was clean supply or drain water, but the board is soft. Under the EPA and NDSU rules, it comes out.
- You cut a square beyond the soft area, discard the wet insulation above it and let the joists dry with a fan. The meter reading matches a dry part of the ceiling a few days later.
- A new piece is screwed to the joists, taped and coated in thin layers, feathered well past the edge.
- After sanding, stain-blocking primer goes on the patch and past the old ring.
- The whole ceiling gets the finish coat, so there is no visible square.
The repair itself takes a few short sessions because compound needs to dry between coats. The painting is a matter of hours. Time and skill, not materials, are what you are really spending.
When to hand it to a professional
Some jobs should not be a weekend project:
- Water that was contaminated, deep, moving or still entering the house. A qualified water-restoration company should handle these, as the guidance cited earlier says.
- Suspected mold over a large area, or in the framing.
- Damage near electrical wiring.
- A large ceiling section, where lifting and fastening boards overhead is hard and risky.
- A sagging ceiling. Wet, heavy ceiling board can fall; keep people out from under it.
Once the wall is dry, sound and free of the leak, the finishing work is ours to take on. If you are in Davis, Land Park, East Sacramento, Midtown, Curtis Park or El Macero, we can look at the wall and give a free estimate.
Having us finish the repair
Our work includes drywall repair along with interior and exterior painting, color consulting, texturing and cabinet refinishing, so the patch and the paint come from one crew. We coordinate projects through a personal concierge who gives daily progress updates, and our painters are focused on careful preparation, detail and respectful service inside your home. Guarantee and warranty options are available.

Our published price range for interior painting projects is $2,500 to $8,000 one-off, depending on scope, and exterior painting runs $3,500 to $12,000. You can see what we offer on our main page or request an estimate there, and we will tell you what a repair-and-repaint of your damaged room involves.
FAQ
Is drywall ruined once it gets wet?
Not always. EPA says drywall can be dried in place if there is no obvious swelling and the seams are intact. Soft, swollen or sagging board, or board that cannot dry within about 48 hours, should be removed and replaced.
Will a dehumidifier dry wet drywall?
A dehumidifier plus fans can pull moisture from the surface, and NDSU Extension recommends that combination. It will not reach everything: the wall cavity needs ventilating too, and wet insulation should be removed. Use fans only after you know the water was clean.
Can I paint over a water stain on drywall?
Only once the wall is fully dry and the leak is fixed, and only after a stain-blocking primer. Ordinary wall paint alone tends to let the stain bleed through. Fine Homebuilding says small, dry stains can be sealed with a stain-blocking primer and repainted.
How long does mold take to grow on wet drywall?
EPA says mold will not grow in most cases if wet or damp items are dried within 24 to 48 hours. NDSU Extension says wet materials may mold within one to three days, depending on temperature. That is why drying quickly matters more than any repair step.
Can I patch water damaged drywall myself?
For a small area of clean-water damage, yes, if you can dry the wall, cut and fasten a patch and feather it. If the water was contaminated, the area is large or overhead, or you want an invisible finish, we can do the repair and painting for you.
Sources
- EPA Mold Course, Chapter 4
- EPA water-damage table for mold remediation
- NIH: Instructions for remediating moisture in the first 48 hours
- NDSU Extension: Clean and dry wet buildings quickly, safely
- Fine Homebuilding: Repairing Water Damage
- U.S. Department of Energy: Repairing Walls & Floors
- State Farm: What to do when your basement floods